So I am ALWAYS seeing furniture in the street that has been thrown out or left on the road to be trashed and the possibilities of such things makes me a little excited as well as a bit sad. Excited with all the potential things that can be done and sad because I can't take back EVERYTHING I find or my landlady would go nuts. This chair was actually in the reject zone of my building for about a week and I could not decide- to take or leave? After encountering it about five times I decided it had to come back upstairs with me, where it lived in my room for about a fortnight before I started work on it. In the meantime I visited England for a week and helped decorate a room, and the DIY bug was well rooted in me by the time I returned.

I started out by experimenting with the paints I had lying about seeing how they looked on the wood. As my new room is the bright blue colour I decided that this chair would be a bit boho crazy and opted for using the pink and purple. Once I decided I then gave it a good sanding and wipe over and left to dry.
After I painted the main body in the purple and the wicker back in pink. The wicker was a bit fiddly and took a while, going back and forth etc.
And more painting... I didn't actually do it all in one go as I did bits in between other jobs.
Once I had painted all of what I need to cover on the chair, I neatened the edges of the wicker back using a fine brush.
At this point it looked like this. As you can see I did not paint the seat. This is because I knew it would be covered with fabric and realized that I would be wasting time and paint.
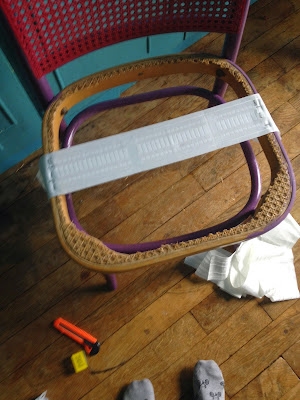
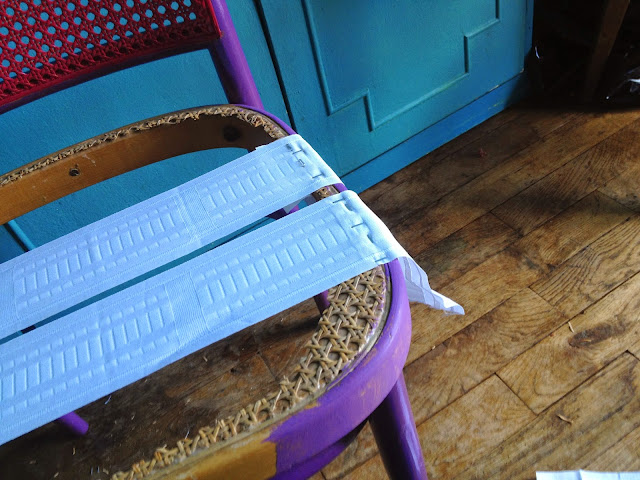
Then the seat got removed....! Just with a craft knife, I hacked it out. And started cutting the tape to size. This "tape" is actually tape use for making curtains because I found it for 2 euro a pack at Ikea and it seemed very strong so I thought why not. And it worked so clearly it was ok. The tape I simply cut to size and stapled in place with a heavy duty staple gun on top of the chair to start with and then on the sides.
And the next one.
Once I had done all the horizontal ones, I started weaving vertical strips across. This is to make it stronger. And deff make sure you pull taunt on it every time you place a staple. This is very important.
Keep going until you have gone all the way around.
Then neaten and strengthen further by stapling on the sides and underneath, to the inside of the seat. By this point you will have a recognizable chair! I wanted padding on my seat so I did this next bit. But its optional.
I had some leftover stuffing from making a cushion and the outer shell of another cushion which I had used the stuffing from and used this to pad my chair. You could use foam or just sandwich the stuffing between two pieces of fabric, I just used what I had.
I stapled this in place and trimmed the excess, also pushing the fuzz into the right places as I went (evenly).
I then placed the fabric on the chair to figure out pattern placement and cut it out. Then placed a few staples in the middle of each edge, pulling on it as I went to keep it tight.
The corners were fiddly. I stapled them as you can see, top left then cut the excess off.
Underneath it looked like this. I folded the fabric under and around the leg and went staple crazy. This was just for the front two legs.
For the back two legs I folded the fabric back, and cut the triangle off as you can see below.
I then folded the fabric around the leg and stapled in place. I did this for all the legs, always pulling on the fabric to keep it taut.
And this is how it looked! But the staples were visible. I was careful to keep them in a straight line near the edge but its still ugly. So I bought 2m of some funky trim and used my glue gun to put it in place.
Going all the way around, bit by bit.
Et voila!
Finished!


No comments:
Post a Comment