Monday 7 October 2019

New things....


It has been a long, long time since I used this platform- I have neglected it terribly. Instead I moved over to instagram which I use tons. I have been using instagram to sell the odd bits n bobs, however, it lacked the ability to display everything that is available at once and I don't want to go back to paying Etsy's high fees. So I made a page with pictures of things that are for sale... If there is anything that takes your fancy, then as I have been doing for the last year, message me on instagram, I will let you know what I have in stock and we can arrange payment via paypal. Simple (and keeps prices down as I am not shelling out loads of money to Etsy). 

So please, check out my instagram or my for sale page


Monday 21 August 2017

Crochet Mishaps and the Goldberry Shawl

My, it has been a while since I wrote. I have recently upped and moved sticks AGAIN, this time back to good old England. Paris is no more my home (small sob). This means lots is changing, generally for the better, and yip yip, I will be getting a kind of studio complete with Orla Kiely wallpaper plastered in all its mustard glory on one wall.

But most recently I have been on a crochet mission. I discovered a beautiful wool shop in Bath called "Wool" and bought some super yummy Debbie Bliss Fine Donegal wool in a (yup) mustard, and decided to make a shawl. I have never worn a shawl before but a lot of some seriously cool people (in my eyes, for example, Dottie Angel), wear them, so I am going to too.


This is the result, I somehow ended up with an additional two points on it, so word of warning, don't make the mistake I did, when it means "in center point", it doesn't mean each center point, it means the one point that is in the center obviously. oops!

The pattern is on Ravelry, and is called Goldberry Shawl. Once you get past the first bit, it is quite easy. And even that is easy as long as you can count and keep track, I am a bit of a clutz so I did go a bit wayward at times.


Though it doesn't hang as well with three points, I was enamored enough to try a second, which I whizzed up in two days in Rowan Hemp Tweed, in Kelp and Duck Egg, for my mother for Christmas, shhhh!


It was a mighty success second time around, I did the points in the center point only, and thus got the desired triangle shape. Perfect for wearing whilst crab apple picking... (&with my favourite Cleo Dress).


Even the little pup got involved in the gathering...


 We shall be making some kind of beverage with the apples, not sure what yet. We currently have kilos and kilos of rosehips, elderberries, blackberries, damsons and god knows what, in the freezer and fridge waiting to be made into drinks and preserves. It really feels like Autumn is coming. Watch this space....

Saturday 6 May 2017

Altering the Bettine Dress


Tilly and the Buttons patterns are really some of the easiest I have ever followed, so I was quite excited to try this one out. I measured myself up and found I fell into the second smallest size. However I should have researched the pattern before cutting it up because when I made it up I discovered I could barely get it over my derriere.

(Also worth noting if you have an ample chest, you might have similar issues, thankfully I don't). As I was making the version with pockets, it made it a little more of a faff to alter, but actually as you will see, it was pretty easy in the end).


(This is the first one I made, with a vintage floral fabric and all the optional extras, tabs, pockets)

So if you had the same problem as me, this is how I altered it!


So I felt that it fit perfectly on the upper half, and around the waist, and though it did fit on the bottom half, it was kind of hard to sit down.


As you can see, it is a little too huggy.

(Here are the sleeve details)


So here are some tips for widening the skirt:


You will need some large pieces of paper or smaller ones taped together. Then take the back piece of the skirt pattern as your base, and draw a line skimming off the widest point down. You can see MY pattern piece behind the original to see the difference. Make sure you copy all the markings across. 


Copy that back piece. Then take the front skirt piece from the Bettine pattern and copy that pocket curve in and the markings from THAT piece.


Now for pockets.You will see here that I have stacked the original pocket bag, mine and the back skirt piece. There is a very slight difference between the original pocket piece and the skirt- you need to add that or it won't get stitched into the seam. 


See, a very small extra bit.

Then do a similar thing for the pocket facing.


You should now have four altered  pieces. Make sure you copy all the markings across as you go.


 At the end, stack them all up, they should all line up well. Alter if needed.

As you haven't changed the waist of the dress, it will all sew up just as easily as the first pattern. To test the fit of the new skirt section, I made this practice from a cheap peacock cotton:


It actually fits beautifully and I wear it often.


Modelling in Provins, France. I will soon be making a whole new Bettine and will share the outcome when its done. Though now I can move and sit down easily, I know it will work fine.


Sunday 5 February 2017

Making Your Own Adult Leggings, EASY PEASEY


Making your own leggings is EASY-PEASEY. I always assumed it would be terribly hard, exasperating and just not worth the effort. I spend so much time envying the pretty leggings that little girls get to wear (I KNOW!!) and imagining lovely candy striped legs, but it is impossible for me to find leggings I actually like. And tights, don't get me started. I try to like wearing them, but they just don't stay put for me. So I decided to try, and it could not have been more easy!

On an almost daily basis I wear Forever 21 grey leggings, they do a shade that just seems to match all my clothes and so I regularly order some in to the store (because typically they never have them when I go looking). And it struck me, that as those fit me perfectly, I already have a pattern. So the last pair that bit the dust and got holes where you don't want holes got sacrificed to my grand plan. I scoured the shops in the Montmarte area of Paris, Marche Saint Pierre and the best jersey I could find this grey with flamingo print. Not my cup of tea exactly but I was impatient to test my theory.


What You Need:

*An old pair of leggings that fit you perfectly, pref ones that are holey
*Jersey fabric, amount will depend on size and height, I am a size 8-10 and I bought a meter, there was some left over but not as much as I expected, if you are unsure I suggest you do the first step at home and take your disassembled leggings to the store to make sure you get enough. It is essential you check the fabric has a decent amount of stretch!
*Elastic, enough to comfortable go around your waist, with an extra 2 inches, approx. I suggest 1.5cm wide ish. Use the waistband on your old ones for a guide.
*Cotton thread that colour matches your fabric
*Sewing machine and all that jazz

Step One


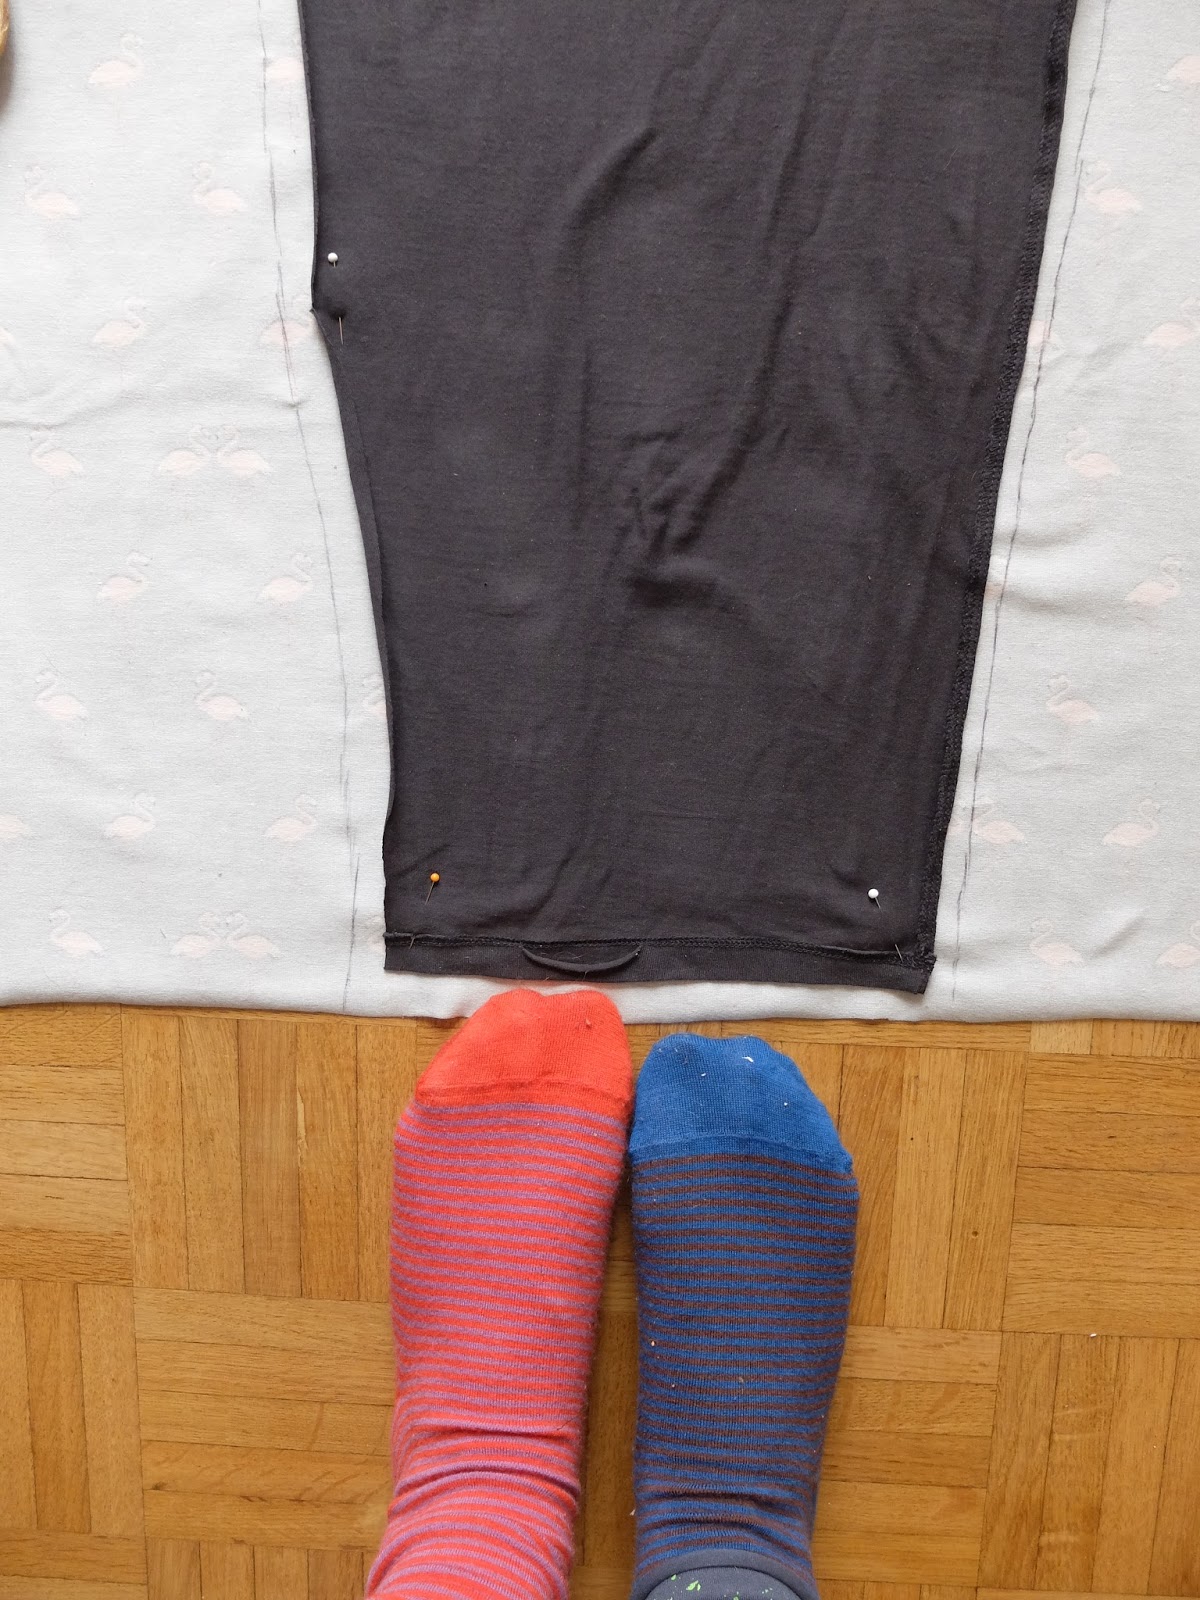
Cut up your old leggings. Start by cutting off the waistband (perhaps it could be useful for another project?). Then cutting one leg off the pair, and then finally up the seam on that separated leg. You should be left with a shape like the one above. Always cut as close to the seam as you can. The discarded leg can be used to test your stitch and tension or practice sewing on jersey or what have you. It can be used for making something else too.... 

Remember if you have no idea how much fabric to buy, you will need two of those legs so you could measure its widest point (+seam allowance) and length (+seam allowance) to get a vague idea.

Step Two


Fold fabric in half, right sides together and pin leg pattern to it. If you want, draw a line roughly one cm away from the edge, taking care of curling, all the way around.


Step Three


Take one leg and fold in half with the sides touching.


Pin in place.


Stitch using a zig zag stitch, remember how much space you left for seam allowance. I would practice on your spare old leg first, and test its strength. I gave it a good tug, pulled it on over the thickest part of my leg etc to see if the stitches would break. Once I was satisfied I moved on to my new ones.

Repeat for second leg.

Step Four


Turn both legs the right way out and match the crotch seems up. Pin together as pictured. The seams must match up totally. I put a second pin in further down to prevent the legs becoming misaligned.


Then proceed to pin up the butt seam and the front (sorry!)


I am attempting to show you what I mean, but it should be obvious really. Just make sure everything lines up and is tidy.

Then stitch away!

Step Five


You should have something resembling leggings now. All that is left is the waistband. If you have ever made a simple skirt, this will be familiar business.


Roll the top over, first a little bit, then enough to comfortably accommodate your elastic. This is so that your waistband is nice and comfy and tidy too. Pin in place and just to make sure, tack it around with a large running stitch and remove the pins.


You can see my tacking here.

Step Six


Using zig zag again, stitch around the waistband, on the edge, all the way around, leaving one inch open. Measure your elastic, it should be the circumference of your waist, plus two inches. I just guess by holding it against  me. Feed the elastic around using a safety pin.


Overlap the elastic and stitch over several times. Make sure it is strong. Push it into the waistband and stitch up your gap.


As an after thought I got a bit worried that the elastic might get twisted as I wore and washed them, So I stitched over the elastic where the front and back seams were. 
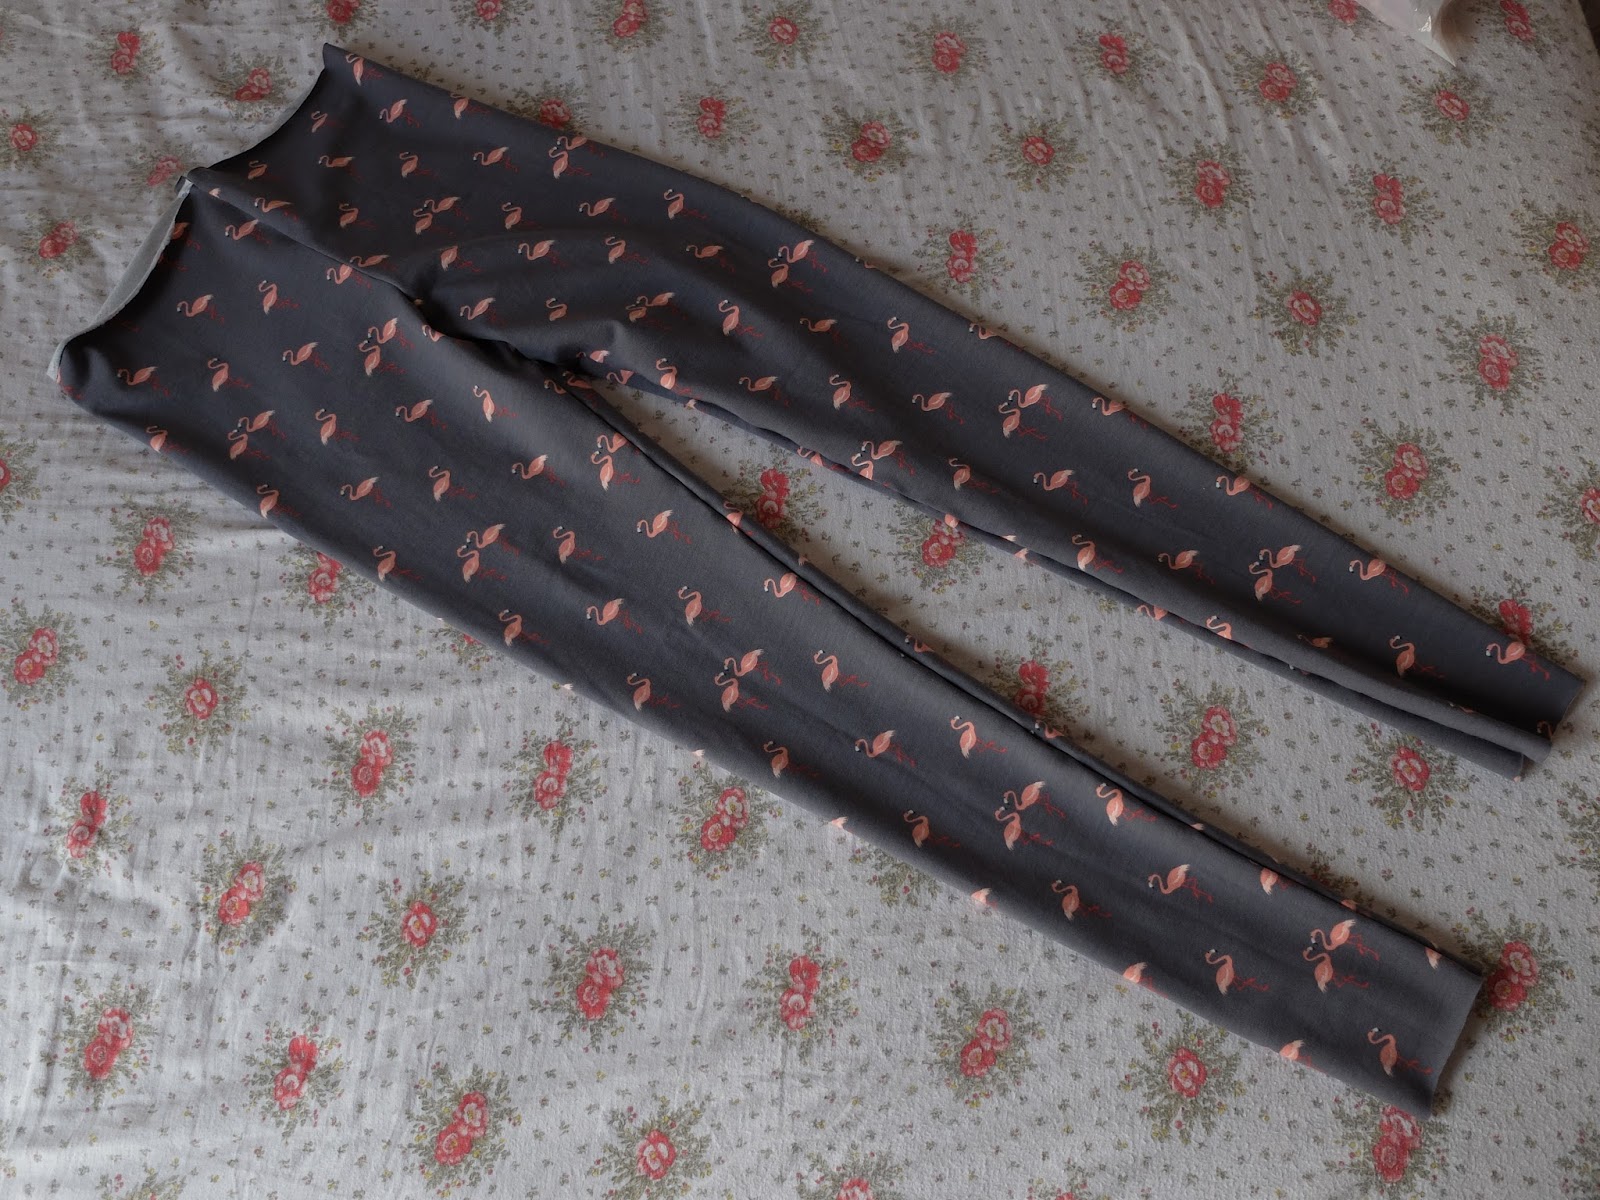

Et Voila!


Excuse the panty lines on the second picture, I am deffo not the kind to wear just leggings and a tshirt (unless its to bed), but I wanted you to see that they fit mighty well. My housemate said they looked bought!

You will notice I did not hem the ends. Apparently jersey never frays. Plus my only not plain leggings, my absolute favorites, which do peek into one of the photos on this tutorial, are also left unfinished. I have been wearing them for a couple of years, and its never been an issue, plus its less bulk and pressure on your ankle. And less chance of breaking your stitching. For the sake or ease, I won't give myself extra work!

I am VERY pleased with this. It took me longer to write up this tutorial than actually make them, I think all in all it was about an hour. Nothing was too fiddly, it was a piece of cake. I spent the morning reading up on sewing jersey fabrics, having special needles and feet and all sorts. Tilly and the Buttons suggests just using an ordinary sewing machine and a zig zag stitch so I thought what the hell. So here is proof, you don't need any fussing to make your very own leggings. I feel a very expensive fabric order coming on.... 

Sunday 24 April 2016

Some More Pretties


I am having one of those periods where there is so much I want to do but never enough time to get it all done. I have mental crafty to do lists as tall as this crate wall! I have managed to do a few, but there are more mitts to embroider, pins to make, skirts to sew..... lots and lots.


This little cropped cardi was in the unwanted pile of a friend, so I snapped it up and gave it some loving. What do you think? (Incidetally, I also made the skirt, a little too short but that's all the fabric I had left, and the shoes were snagged in a charity shop too!)


*******
This dress was the cause of not enough fabric (also because my mother wanted a cushion cover made from it too!). I am kinda pleased, I mean I am not so keen on the back of it but, well, for a first go why not?


*******


Something else I picked up in a thrift store, it was such a soft fabric. A little big so I took it in, then loved it up with some velvet and lace trim.


Hippity hoppity happy. Though I would like to add a pocket too.


*******
And finally....

In my quest to try to learn how to crochet (what a mighty quest that has become), I made this little pin.


I made it by crocheting a doily flowery thing, and collecting a few little treasure to attach to it. Think of all the thrifty possibilities!